What Suppliers Hide About custom LED stage bracket extrusion aluminum profile
When sourcing custom LED stage bracket extrusion aluminum profile for concert touring, architectural or permanent lighting, you’ll see big performance gaps among extrusions; sturdy long-term brackets versus heat-induced warped or cracked ones depend on alloy selection, die design and precise post-processing. With a decade as a process engineer reviewing countless extrusion drawings for LED frames, electronics and auto parts, I’ve seen many buyers fixate solely on per-kilogram pricing only to encounter overheating, weak anodizing or dimensional errors on 2m-long custom LED stage bracket extrusion aluminum profile, and this guide outlines critical engineering details from thermal modeling to CNC finishing for stable brackets, using the same quality standards we follow for our LED components production, with identical production rules applicable to aluminum heat sink extrusion for other scenarios.
Why Your LED Stage Bracket Needs More Than Just a Simple Angle Shape
A stage bracket for LED panels is not a static structural part. It experiences vibration from subwoofers, thermal cycling from high-output diodes, and mechanical loads from rigging chains. A simple bent sheet metal bracket often fails because it lacks integral stiffening ribs and continuous heat dissipation paths.
Extrusion allows you to combine multiple functions into one monolithic custom LED stage bracket extrusion aluminum profile. For example, we regularly design profiles with:
Integrated T-slots for quick attachment of clamps or safety cables.
Internal channels for wiring hidden from view.
Thickened mounting pads where screws or rivets go.
Longitudinal ribs that increase bending stiffness without adding weight.
Moreover, the extrusion process naturally aligns the grain flow of aluminum along the profile length, which gives superior fatigue resistance compared to machined-from-plate brackets. When we produce a custom LED stage bracket extrusion aluminum profile for a client who tours their LED walls across 50 shows per year, the extrusion consistently outlasts welded fabrications.
Table 1: Comparison – Extruded vs. Bent Sheet vs. Cast LED Stage Brackets
Property
Extruded Profile
Bent Sheet Metal
Die Casting
Tooling cost (low volume)
$800 – $2,500
$0 – $500 (brake press)
$5,000+
Section complexity
High (hollow, ribs, slots)
Low (simple bends)
Medium (but draft angles required)
Thermal conductivity
Excellent (uniform wall)
Poor (thin, spotty contact)
Good (but porosity reduces it)
Dimensional stability over 2m
±0.2mm typical
±1mm or worse
Not practical for long lengths
Lead time for first article
4–6 weeks
1–2 weeks
6–8 weeks
For a typical LED wall touring pack, the upfront tooling for a custom LED stage bracket extrusion aluminum profile pays for itself after the first 500 units, thanks to faster assembly and lower replacement rates.
Aluminum 6063 Heat Sink Extrusion – The Hidden Thermal Requirement
Many lighting designers overlook one key point: LED stage brackets double as heat sinks. Mid-power 30–50W LEDs overheat fast without proper heat dissipation from mounting structures, so bracket shapes need both structural support and thermal transfer. Choosing aluminum 6063 heat sink extrusion works well; 6063 boasts strong thermal conductivity at ~200 W/m·K and easy extrusion into intricate forms, outperforming harder-to-process 6061 for thin-wall, fine-fin designs. We refine these profiles with precise aluminum CNC machining to match strict size requirements. Our aluminum 6063 heat sink extrusion features front mounting plates and rear fins, boosting surface area 300–400% to cut LED temperature by 15–20°C and extend lamp lifespan, while its good anodizing performance guards against outdoor or humid-site corrosion and boosts heat radiation. A practical tip: ask suppliers for FEA thermal simulation before die production; low-cost pre-testing eliminates overheating flaws and costly on-site equipment breakdowns.
Custom Heat Sink Extrusion – When Your LED Stage Bracket Must Double as a Thermal Manager
Sometimes a standard fin pattern is not enough. You may have a unique LED module with irregular component placement, or you need to fit the bracket into a narrow truss pocket. That is where custom heat sink extrusion becomes essential.
A custom heat sink extrusion allows you to:
Vary fin height and spacing to match airflow direction (vertical vs. horizontal mounting).
Embed threaded inserts or mounting bosses directly into the extrusion.
Create asymmetrical shapes that clear adjacent cables or connectors.
Combine the bracket arms and heat sink base into a single extrusion, eliminating assembly screws.
When you evaluate suppliers for custom heat sink extrusion, ask to see their extrusion press capacity (minimum 1,800 tons for wide profiles) and their in-house CNC machining. A profile that comes out of the press still needs to be cut to length, have holes drilled, and often have critical surfaces milled flat. (If you are still comparing different extrusion approaches, our aluminum extrusion for LED stage bracket page includes a side-by-side cost analysis of standard vs. custom fin geometries.)
Aluminum Extrusion Heat Sink Profiles – Design Rules for Manufacturability
Not every shape can be extruded economically. Understanding basic design rules for aluminum extrusion heat sink profiles will save you weeks of back-and-forth with the die shop. Here are the top constraints we see engineers violate:
Fin aspect ratio – Height-to-gap ratio should stay below 10:1 for solid dies, or up to 15:1 with steel-tipped dies (higher cost). A 50mm tall fin needs at least 5mm gap to avoid die breakage.
Wall thickness uniformity – Try to keep adjacent walls within a 2:1 ratio. A thick boss next to a thin web creates uneven metal flow, leading to twist.
Minimum wall thickness – For 6063, 0.8mm is possible for small profiles, but for stage brackets we recommend 1.5–2.0mm to survive handling and anodizing.
Avoid sharp internal corners – Inside radius should be at least 0.5mm, preferably 1mm. Sharp corners create stress risers and die wear.
Aluminum extrusion heat sink profiles that follow these rules run at higher press speeds (15–20 meters per minute), which lowers your piece price. Conversely, a die that is pushed too far may produce only 500 kg before cracking, forcing you to pay for die rework.
Table 2: Maximum Recommended Fin Aspect Ratios for Aluminum Extrusion Heat Sink Profiles
Alloy
Standard Die
Steel-tipped Die
Typical Application
6063
10:1
15:1
LED brackets, consumer electronics
6061
8:1
12:1
Automotive, higher load
6005A
9:1
13:1
Automation arms
For a typical custom LED stage bracket extrusion aluminum profile, we stay at 8:1 fin ratio to be safe. That gives you a strong, cool-running bracket without exotic tooling.
Aluminum Heat Sink Extrusions – How to Verify Quality Before Mass Production
You have approved the drawing, paid for the die, and received first samples. Now what? Many procurement teams simply check overall length and bolt hole locations – and miss critical defects that will show up after 100 hours of stage use.
When inspecting aluminum heat sink extrusions for LED brackets, add these five checks to your incoming quality control (IQC):
Straightness – Lay the profile on a granite surface plate. A 2m length should have gap less than 0.5mm per meter (EN 755-9 standard). Twist is measured by clamping one end and rotating the other; we accept ≤0.5mm per 300mm.
Surface finish – No die lines deeper than 0.1mm. Deep lines become visible after anodizing and can trap dirt.
Hardness – 6063-T5 should reach 8–10 Websters (approx 60 HB). Softer material indicates improper aging.
Flatness of mounting face – Where the LED module contacts the bracket, specify a flatness of ≤0.1mm over 100mm. Otherwise you need thermal paste, which adds cost.
Grain flow – Cut a cross-section, etch with sodium hydroxide, and inspect under low magnification. You want fine, uniform recrystallized grains, not coarse columnar grains that indicate poor billet quality.
Reputable extruders will provide a certified material test report (MTR) showing chemical composition and mechanical properties for each batch of aluminum heat sink extrusions. Reject any shipment without a traceable MTR.
Aluminum Extrusion for Heat Sink – How CNC Post-Processing Makes or Breaks Your Tolerances
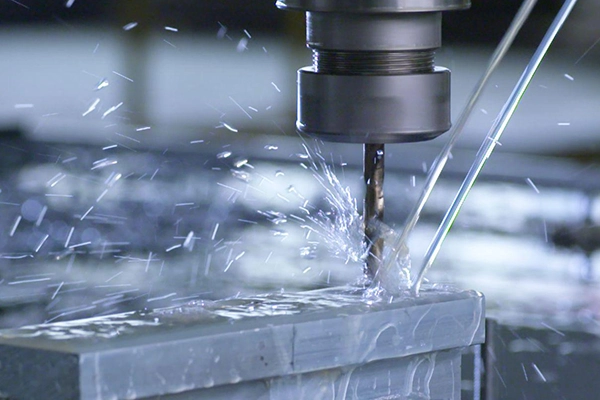
Extrusion gives you a near-net shape, but critical features like mounting holes, counterbores, and edge profiles still require CNC machining. And here is where many projects go wrong: they assume any machine shop can hold ±0.1mm on a 2-meter extrusion.
The truth is that long, slender extrusions move during machining. Clamping forces, tool pressure, and residual stress from extrusion can cause the profile to bow or vibrate. A shop that specializes in aluminum extrusion for heat sink components will use techniques like:
Soft jaws that grip the profile over a large area.
Multiple-stage fixturing that supports the entire length.
Climb milling with sharp carbide tools to reduce cutting forces.
Stress-relief thermal cycling (150°C for 2 hours) before final machining.
We maintain ±0.02mm tolerance for key holes and ±0.05mm for fitting surfaces on premium LED brackets. Precision needs large 3-meter CNC machines with flood coolant; manual mills or small routers cannot hit under 0.05mm accuracy. When quoting aluminum heat sink extrusion for heat sink brackets, confirm hole positional tolerance on 1500mm profiles. Any instant reply of ±0.5mm is untrustworthy.
Real-world example: A client insisted on ±0.03mm for four mounting holes on an 1,800mm stage bracket. We achieved it using a horizontal machining center with a custom vacuum fixture. The extra fixturing cost $400 per batch of 200 pieces – but it eliminated a secondary alignment step in their assembly, saving them $2,000 per week. That is the value of tight CNC control.
Heat Sink Aluminium Extrusion – The Purchasing Decision Logic Smart Buyers Use
After reviewing hundreds of RFQs, I have noticed that the most successful buyers (the ones who get consistent quality, on-time delivery, and fair pricing) follow a similar decision process. Here is their logic when sourcing heat sink aluminium extrusion for LED stage brackets or any other application.
Nice-to-have: RoHS certification, in-house anodizing line, ISO 9001:2015.
Step 2: Validate extrusion and CNC capabilities separately
Do not assume one supplier does both well. We often extrude profiles and send them to a dedicated CNC job shop for finishing. Ask each candidate for a sample of a similar long part.
Step 3: Compare total cost, not per-kg price
A lower extrusion price often means poorer surface finish (requiring more polishing) or wider tolerances (requiring extra machining). Factor in your downstream labor.
Step 4: Check their die management policy
Who owns the extrusion die? Good suppliers store your die for free for the first year and offer die modifications at cost. Some shops charge a monthly storage fee – avoid them.
Step 5: Request a small pilot run before mass production
Order 20–50 pieces first. Assemble them into your LED stage system. Test thermal performance with a thermocouple. Only after the pilot passes all criteria, release the volume order.
Heat sink aluminium extrusion is a mature process, but execution varies wildly. The cheapest quote is almost never the best when your stage bracket must survive a 3-year tour.
Table 3: Typical Tolerances for Heat Sink Aluminium Extrusion – What to Expect
Feature
Standard (no extra cost)
Precision (extra 15-20%)
Cross-sectional dimensions
±0.25mm
±0.10mm
Twist (per meter)
≤1.0mm
≤0.3mm
Flatness (per 500mm)
≤0.5mm
≤0.15mm
Cut length (2m)
±2.0mm
±0.5mm
Hole position (CNC)
±0.15mm
±0.03mm
For a custom LED stage bracket extrusion aluminum profile that must fit into a precision truss system, choose precision tolerances on the interfaces and standard on non-critical areas. This hybrid approach keeps costs reasonable.
Aluminum Extrusion Heat Sink Components – Assembly and Finishing Tips for Long Life
After extrusion, CNC and anodizing comes LED panel assembly. Tiny errors damage aluminum extrusion heat sink components. Pick A2-70 stainless screws with anti-loose coating; skip zinc-plated screws to avoid aluminum galvanic corrosion in damp venues. Fit 0.5mm non-silicone thermal pads (3 W/m·K) between LED modules and brackets to fill surface gaps; silicone TIM pollutes lamp lenses. Scratch local anodization at grounding spots for reliable earthing and EMI control. Tighten M4 screws to 2–3 Nm per specs; over-torque strips aluminum threads. Many aluminum extrusion heat sink components fail from improper screw installation. Record assembly torque rules for reference.
Five Common Myths About Custom LED Stage Bracket Extrusion Aluminum Profile
Myth 1: “Extrusion dies are too expensive for small quantities.” Fact: A simple open profile die can cost as little as $800. For 200 pieces, that adds $4 per part – often less than the cost of welding and grinding a steel bracket.
Myth 2: “All aluminum alloys are the same for heatsinks.” Fact: 6063 has 30% better thermal conductivity than 6061. Use 6063 for LED brackets; save 6061 for structural arms that see high mechanical loads but low heat.
Myth 3: “Thicker walls always mean stronger brackets.” Fact: A well-designed extrusion with ribs and gussets is stronger and lighter than a solid thick plate. Add mass only where loads enter.
Myth 4: “CNC machining always adds too much time.” Fact: Modern CNC routers can process a 2m extrusion in under 3 minutes, including tool changes. The bottleneck is fixturing, not machining.
Myth 5: “Anodizing reduces thermal performance.” Fact: A 10μm anodic layer adds negligible thermal resistance (less than 0.05°C/W). But dark colors (black, red) actually improve radiative cooling, which matters for outdoor stages under sunlight.
Understanding these myths helps you specify a custom LED stage bracket extrusion aluminum profile that delivers real value, not just a low initial quote.
PAA (People Also Ask) – Quick Answers From a Machinist’s Desk
Q1: What is the minimum order quantity (MOQ) for a custom LED stage bracket extrusion aluminum profile? A: Most extrusion houses ask for 500–1000 kg per order to justify a die change. However, many job-shops (including ours) offer low-MOQ programs starting at 200 kg for standard 6063, with a small setup fee. For prototypes, we can run as little as 50 kg using a sample die. Always ask for “low MOQ extrusion services” – they exist.
Q2: How long does an extrusion die last for aluminum 6063 heat sink extrusion? A: A well-maintained die made of H13 tool steel can produce 15–25 tons of 6063 before needing refurbishment. Simple solid dies last longer (30+ tons). Complex hollow or fin-heavy dies may need repair after 8–10 tons. Your extruder should log die passes and warn you when wear affects tolerances.
Q3: Can I weld an aluminum extrusion heat sink profile to another bracket? A: Yes, but with caution. 6063 is weldable using 4043 or 5356 filler wire. However, welding destroys the T5 temper in the heat-affected zone (HAZ), softening the material to about 50% of original strength. If you must weld, design the joint away from high-stress or high-heat areas, and consider re-aging the assembly (but that is rarely practical). Better to design the extrusion as one piece.
Q4: What is the typical lead time for custom heat sink extrusion including CNC? A: From drawing approval to first sample: 4–6 weeks for die manufacture (3 weeks if you pay a rush fee) plus 1–2 weeks for extrusion and CNC programming. For production quantities after sample approval, expect 3–4 weeks. Always add 1 week for anodizing if done off-site.
Q5: How do I prevent galling when screwing into aluminum extrusion heat sink components? A: Use a thread forming tap (not cutting tap) to create rolled threads – they are stronger and smoother. Apply a dry film lubricant (like wax or MoS₂) to the screw threads. Better yet, specify stainless steel screws with a nylon patch. Avoid overtightening; use a torque wrench set to 70% of the proof torque for your screw size.
Ready to start
Your next project?
Contact our technical experts today for a customized solution and a tailored quotation.
Our expert team will contact you within 24 hours
to provide a free technical evaluation and solution design, helping you upgrade your production process.
ADDRESS
NO.22,You Yi Road ,Wulian Community, LongCheng Street ,Long gang District ,Shen Zhen