LED Aluminum Extrusion for Complete Stage Display Frames, Brackets, and Assembly Systems
An industrial LED aluminum extrusion is not always a narrow channel for a strip light. In stage displays, rental LED walls, and modular video systems, aluminum profiles form part of a larger mechanical platform that must carry cabinets, align adjacent modules, resist repeated handling, and connect quickly during installation. The extrusion works together with machined brackets, cast or fabricated frames, clamps, hinges, fasteners, backplates, and adjustable supports. Yueyi Precision can manufacture individual structural parts or coordinate the complete bracket system through extrusion, CNC secondary machining, surface finishing, component inspection, and final assembly. This guide explains how engineers and procurement teams should design and source stage LED structures as integrated systems rather than treating each rail, connector, and clamp as an unrelated item.
How LED Aluminum Extrusion Functions in a Complete Stage Support System
For a stage LED structure, the extrusion is the load-distributing backbone. It establishes cabinet spacing, carries mounting interfaces, provides straight reference surfaces, and gives clamps and brackets a repeatable location. However, the extruded rail alone does not create a usable support system. Each end, joint, corner, pivot, and locking position requires a component that transfers force without allowing the display modules to shift.
The system must be considered at four levels:
System level
Typical components
Primary engineering objective
Linear structure
Extruded rails, beams, and tracks
Straightness, stiffness, low mass
Connection structure
Corner modules, irregular connectors, and couplers
Load transfer and repeatable alignment
Adjustment and locking
Clamps, levers, pivots, and quick locks
Fast installation without play
Cabinet interface
Backplates, frames, and mounting brackets
Module position and service access
This wider system definition separates industrial led extrusion work from ordinary decorative lighting channels. The buyer is not only purchasing a cross-section by the meter; the buyer is sourcing a mechanical platform that must assemble correctly at the venue.
Structural Requirements Must Be Defined Before the Extrusion Cross-Section
Selecting a rail from an existing catalog can be efficient when loads and interfaces are conventional. A custom stage frame, however, should begin with the installed system: cabinet mass, overall span, support spacing, connection points, transport method, and assembly frequency.
Inputs That Determine the Profile Architecture
Engineering teams should define:
Supported cabinet or fixture mass
Maximum span between support points
Vertical, horizontal, or suspended installation
Static and handling loads
Required stiffness and permissible deflection
Clamp and fastener locations
Repeated setup and teardown frequency
Interface with cabinets, poles, trusses, or floor bases
Cable-routing and service-access requirements
Surface-finish and appearance standards
Shipping length and packaging limits
The design should also distinguish the permanent structural load from temporary handling forces. A bracket can experience its highest local load when a technician tightens a lever, swings a cabinet into position, or carries an assembled module—not only when the display is operating.
Stiffness Cannot Be Judged by Profile Weight Alone
A heavier profile is not automatically more rigid in the direction that matters. Material positioned away from the neutral axis contributes more effectively to bending resistance than material concentrated in a thick central block. Ribs, closed cavities, wall placement, and connection geometry often produce a better stiffness-to-weight balance than simply increasing every wall.
Cross-section decision
Possible benefit
Risk if poorly controlled
Closed or semi-closed cavity
Higher torsional stiffness
More complex tooling and internal access
External ribs
Improved local stiffness
Interference with clamps or cabinets
Thickened connection zone
Better fastener support
Uneven metal flow during extrusion
Integrated mounting track
Faster bracket positioning
Tight tolerance over long lengths
Weight-relief pocket
Reduced transport mass
Local weakness near a load path
The Connection Module Determines Whether the Frame Behaves as One Structure
The joint shown in the assembled structure demonstrates why connection modules deserve the same attention as the main rail. A strong beam connected through a flexible or poorly located joint will not deliver a stable screen wall. Bolt positions, bearing surfaces, rib geometry, tube engagement, and clamp direction determine how loads move from one member into the next.
Functional Surfaces in a Structural Joint
Joint feature
Function
Production control
Tube or rail seat
Establishes member location
Bore, slot, or profile fit
Bearing face
Transfers compressive load
Flatness and surface contact
Through-hole
Carries bolt or pin
Position and diameter
Rib or gusset
Reduces local flex
Wall fill and transition radius
Locking interface
Prevents unintended movement
Engagement and retention test
Assembly clearance
Allows installation
Tolerance-stack review
Why Extrusion, Casting, and CNC Machining May Be Combined
Not every three-dimensional connector should be forced into an extrusion. Long members with consistent cross-sections are well suited to extrusion. Irregular nodes, enclosed clamp bodies, deep local ribs, and complex corner modules may be produced through casting, CNC machining, fabrication, or a combined route, depending on quantity, geometry, strength, finish, and tooling economics.
The complete assembly should therefore be process-neutral during DFM. The correct question is not “Can every part be extruded?” but “Which process produces each load-bearing interface most reliably?”
Irregular Brackets Convert Linear Profiles into Stage-Specific Geometry
The irregular bracket illustrates a typical challenge in stage structures. Linear rails must connect around cabinets, tubes, handles, power modules, or access zones. The connecting part may therefore require offset arms, circular bores, hooks, pockets, or asymmetric load paths.
Critical Risks in an Irregular Connector
Bore axes that do not align after finishing
Thin transitions near heavily loaded holes
Insufficient fillet radius at an arm junction
Distortion across a long, asymmetric body
Tool marks on visible black surfaces
Coating buildup inside a close-fitting bore
Incorrect left-hand and right-hand orientation
These parts require clearly identified functional datums. A cosmetic outer edge should not become the primary reference if the component actually locates through two circular bores and an end hook. Machining and inspection should recreate the way the bracket fits the final frame.
Support Brackets Must Be Evaluated in the Assembled Direction
The support bracket may experience bending, bearing load at pivots, and repeated clamping during installation. Inspection should therefore verify more than individual hole diameters. Hole-to-hole distance, bore parallelism, arm symmetry, stop position, and free movement after coating all affect assembly.
Clamps and Quick Locks Must Balance Speed, Retention, and Repeatability
Stage equipment is repeatedly installed, adjusted, transported, and removed. A clamp that requires slow alignment or creates inconsistent preload increases labor at every event. A clamp that locks quickly but allows movement creates an unacceptable structural risk.
A Clamp Is a Tolerance Stack, Not a Single Part
Clamp element
Required function
Common issue
Curved gripping surface
Matches the supported tube
Uneven contact or surface damage
Pivot bore and pin
Allows controlled movement
Excess play or binding
Threaded fastener
Generates preload
Thread wear or inconsistent torque
Lever
Enables rapid operation
Interference with nearby components
Base plate
Transfers load to the frame
Rocking or hole-pattern mismatch
Protective contact
Prevents slip and marking
Material compression over time
Assembly Validation Should Include Repeated Operation
A first assembly can hide wear, interference, or loosening behavior. The validation plan should include repeated locking and release, movement under the defined load, installation with representative tubes or rails, clearance for a gloved hand, and confirmation that the lever remains accessible after adjacent modules are installed.
For a cabinet clamp, the functional result is the relative position of two display modules. The clamp body, lever travel, stop surfaces, and mounting holes must work together so the cabinet edge closes without a visible step or excessive force.
Cabinet Frames Must Protect Alignment While Preserving Service Access
The cabinet is the point where structural, electrical, thermal, and service requirements meet. It must support the display modules, maintain edge alignment with neighboring cabinets, protect internal components, provide handling points, and allow technicians to reach power and signal hardware.
Cabinet Structure Should Be Designed Around Real Assembly Tasks
Important questions include:
Can the cabinet be carried without loading a sensitive panel?
Are locks accessible when cabinets are positioned side by side?
Can power or signal modules be removed without dismantling the frame?
Are cables protected from sharp edges and moving levers?
Do backplate ribs interfere with connectors or airflow?
Can a damaged bracket be replaced individually?
Will the complete module remain within the required transport weight?
Backplate Geometry Must Control Both Flatness and Local Stiffness
Openings remove weight and provide access, but they also interrupt load paths. Cross-members, local ribs, and edge flanges must restore stiffness around mounting zones. The finished frame should be checked on representative support points because a large component can appear flat on a table yet distort when fasteners pull it into the cabinet.
Stage LED Structures Require Both Thermal and Mechanical Integration
The main role of the stage bracket system is structural, but heat cannot be ignored. LED cabinets contain modules, power supplies, receiving cards, and connectors that generate heat. The aluminum structure can participate in heat spreading, yet it should not be assumed to function as an effective heat sink unless the thermal interfaces and airflow are intentionally designed.
Map the Thermal Path Through the Complete Cabinet
Heat Source → Interface or Mounting Plate → Aluminum Structure → Internal Air → Ambient Environment
Thermal question
Why it matters
Is the heat source actually connected to the aluminum?
An air gap prevents useful conduction
Does a coating cover the contact interface?
Coating can change contact behavior
Is airflow blocked by the backplate?
Heat may remain inside the cabinet
Are ribs aligned with the heat path?
Structural ribs may help or obstruct airflow
Can hot modules be serviced safely?
Thermal layout affects maintenance
For high-power led light aluminum extrusions, the thermal requirement should be verified through analysis or temperature testing. For stage support frames, structural stiffness, module alignment, and assembly reliability usually remain the dominant design drivers.
Extrusion DFM Must Account for Long-Length Straightness and Joint Accuracy
A profile can meet its cross-sectional dimensions and still create assembly problems if it bows or twists along its length. Long stage rails magnify small angular and positional errors when multiple cabinets are joined.
Cross-Section Features That Affect Extrusion Stability
Profile feature
Manufacturing risk
DFM response
Uneven wall distribution
Unbalanced metal flow
Redistribute mass or use gradual transitions
Deep narrow track
Weak die tongue
Increase root strength or modify opening
Thin unsupported fin
Wave or incomplete fill
Adjust height and thickness
Sharp internal corner
Stress and poor filling
Add a suitable radius
Heavy local boss
Differential cooling
Balance nearby walls
Asymmetric open shape
Twist
Improve sectional balance and straightening plan
Define Extruded and Machined Requirements Separately
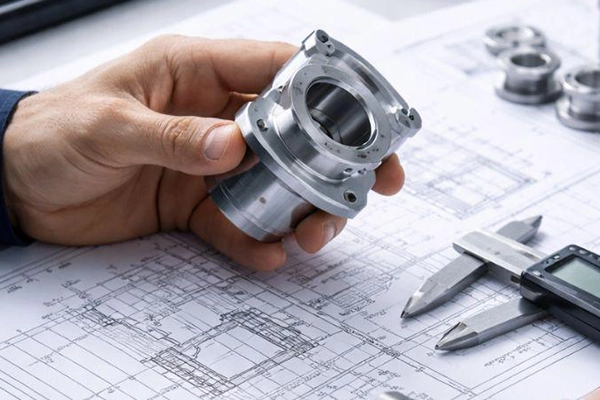
The drawing should identify which surfaces remain as extruded and which receive secondary machining. A long mounting track may use an extrusion tolerance, while a connector bore, end face, or cabinet mounting pattern may require CNC control. Applying machining tolerances to the entire extruded length increases cost without necessarily improving function.
Yueyi Precision’s guide to custom LED stage bracket extrusion design examines additional design decisions for profiles, connectors, and mounting interfaces used in stage structures.
CNC Secondary Machining Turns Long Profiles into Assembly-Ready Members
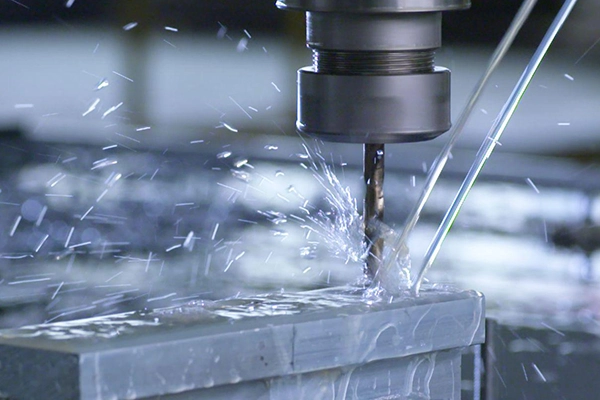
Cut extrusion is rarely ready for final stage assembly. Ends, holes, threads, pockets, and identification features must be referenced to the correct datums so every rail fits the same bracket and cabinet pattern.
Typical Operations After Extrusion
Precision sawing and end-face milling
Drilling cabinet and clamp mounting holes
Tapping fastener locations
Milling connector pockets and access slots
Machining datum pads
Adding cable exits
Deburring tracks and cut ends
Laser marking part number and orientation
Long Profiles Need Support During Machining and Inspection
An unsupported rail can sag during drilling or inspection. Fixtures should support the part without forcing it into an artificial straight condition. Hole patterns should reference a controlled end and functional side or bottom datum, not a rough saw-cut surface.
Black Finishing Must Protect Appearance Without Disrupting Assembly
Black surfaces reduce unwanted visual reflection around stage equipment and create a consistent product appearance. The finish, however, adds another dimensional and handling layer. Close-fit bores, sliding tracks, threaded holes, grounding areas, and locating faces may require masking or post-finish verification.
Finish Control Checklist
Define visible Class A surfaces.
Identify areas where rack marks are acceptable.
Specify gloss, texture, and color limits.
Protect threads and close-tolerance bores where required.
Confirm coating buildup in sliding or snap-fit features.
Inspect scratches under controlled lighting.
Use separators and protective packaging between finished parts.
The process route may include anodizing, powder coating, painting, or another specified finish. The correct term should be confirmed from the customer specification rather than inferred from a black photograph.
Final Assembly Is a Manufacturing Operation, Not Just Packing
Yueyi Precision can supply individual brackets or coordinate a complete stage support assembly. Assembly introduces new CTQs that cannot be confirmed by inspecting loose parts alone: pivot freedom, clamp engagement, cabinet alignment, fastener access, lever clearance, and system stability.
Recommended Assembly Control Plan
Assembly stage
Verification
Incoming component check
Part number, finish, threads, and quantity
Subassembly build
Correct orientation and fastener selection
Torque or preload application
Approved value or functional setting
Movement check
Pivot and lever operate without binding
Interface check
Representative rail, tube, or cabinet fits correctly
Final visual review
Finish, gaps, labels, and missing hardware
Packing
Moving parts secured and cosmetic surfaces protected
Full-System Capability Reduces Interface Risk
When separate suppliers produce the extrusion, machined connectors, clamps, finish, and assembly, each supplier may accept its own part while the complete system still fails to fit. Coordinated production creates one feedback loop between profile dimensions, CNC features, finish buildup, purchased hardware, and final assembly.
This does not mean every component must use the same manufacturing process. It means one engineering plan should define how all components meet at the interfaces.
Prototype Validation Should Reproduce Real Stage Installation
A short profile sample and a loose bracket cannot validate the complete support system. Prototype review should use representative rail lengths, cabinets, tubes, clamps, fasteners, and handling procedures.
Validation Matrix for a Stage LED Structure
Test category
Validation objective
Dimensional inspection
Confirm CTQs and hole patterns
Assembly trial
Verify rails, brackets, and cabinets fit together
Alignment check
Evaluate module gaps and relative position
Static load check
Confirm structure under the defined condition
Repeated locking cycle
Evaluate clamps, levers, and pivots
Handling trial
Identify interference and vulnerable surfaces
Finish inspection
Confirm appearance after assembly
Service-access trial
Verify removal of modules and hardware
Test load, cycle count, acceptance limits, and safety factors must come from the customer’s engineering requirements. They should not be invented by the component supplier or inferred from product photographs.
Procurement Should Cover the Whole Stage Bracket Bill of Materials
Buyers sourcing only an aluminum led profile may provide a cross-section and length schedule. Buyers sourcing a complete stage support system need a more comprehensive RFQ.
Information Required for an Accurate Quotation
Assembly drawing and bill of materials
Individual 2D drawings and 3D models
Profile lengths and annual volume
Alloy, temper, and finish requirements
Cabinet, tube, and truss interfaces
Fastener and purchased-hardware standards
Load and deflection requirements
Left-hand and right-hand variants
Inspection and assembly-test requirements
Packaging method and shipment configuration
Required assembly level: parts, subassemblies, or complete kit
How to Evaluate an LED Aluminum Profile Manufacturer
Supplier question
Evidence to request
Can the supplier review the complete assembly?
System-level DFM feedback
Can it manage extrusion and complex connectors?
Process plan by component type
Can it perform CNC secondary operations?
Fixture and inspection approach
Can it control black appearance?
Finish limits and packaging method
Can it assemble clamps and pivots?
Functional assembly checks
Can it prevent variant mixing?
Part identification and batch control
Can it support repeat orders?
Controlled tooling, programs, and BOM revisions
A qualified led aluminum profile manufacturer should explain how profile variation, machined features, finishing, purchased hardware, and assembly are controlled together—not merely quote the extrusion by weight.
Google People Also Ask About LED Aluminum Extrusions
What Is an LED Extrusion?
An LED extrusion is a continuous profile designed to support an LED-related product. In small linear lighting, it may hold an LED strip and diffuser while assisting heat transfer. In industrial stage and display systems, the term can extend to structural rails and profiles that support cabinets, brackets, clamps, covers, or mounting hardware. The required cross-section depends on whether the primary function is thermal management, optical integration, structural support, assembly positioning, or a combination of these functions.
What Is a LED Aluminum Profile?
An aluminum led profile is an aluminum section engineered for an LED lighting or display assembly. It may include PCB shelves, diffuser tracks, mounting channels, structural ribs, cabinet interfaces, cable paths, or fastener bosses. For stage LED structures, the profile should be evaluated together with connectors, clamps, cabinet frames, machining, finishing, and final assembly. A catalog profile is suitable only when its stiffness, dimensions, interfaces, and production tolerances match the complete installed system.
Source the Stage Structure as One Controlled Mechanical System
A successful LED aluminum extrusion project begins with the complete stage structure—not an isolated cross-section. Rails must carry load without excessive deflection, connectors must transfer force, clamps must lock repeatedly, cabinet frames must preserve alignment, and finished components must assemble without interference. The most reliable route may combine extrusion, casting, CNC machining, fabrication, black surface finishing, purchased hardware, and functional assembly checks.
Yueyi Precision can support individual aluminum profiles, machined brackets, structural connectors, cabinet components, clamp assemblies, or a complete stage-support kit. Send the assembly drawing, component models, load requirements, profile lengths, quantities, finish specification, and required assembly level for an engineering review and quotation.
Ready to start
Your next project?
Contact our technical experts today for a customized solution and a tailored quotation.
Our expert team will contact you within 24 hours
to provide a free technical evaluation and solution design, helping you upgrade your production process.
ADDRESS
NO.22,You Yi Road ,Wulian Community, LongCheng Street ,Long gang District ,Shen Zhen