How Small Precision Parts Are Manufactured Without Losing Dimensional Control
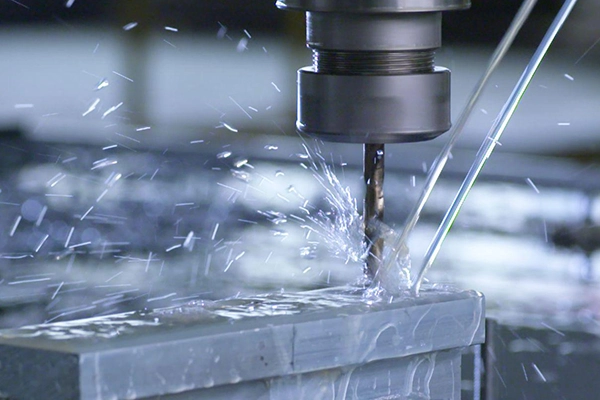
Manufacturing small precision parts is not simply conventional machining performed at a reduced scale. As features become smaller, tool runout, cutting-edge radius, clamping force, burr height, chip size, and measurement uncertainty consume a larger share of the available tolerance. A process that works reliably on a rigid component may become unstable when applied to a thin shaft, micro-hole, narrow groove, or miniature thread. Successful production therefore begins with functional datums and feature risk, followed by suitable workholding, tooling, cutting parameters, chip evacuation, deburring, and inspection. This guide explains how engineers and overseas buyers can evaluate these factors when sourcing small components for automotive, medical equipment, consumer electronics, semiconductor equipment, industrial automation, and LED or stage-equipment applications.
Small Parts Are Not Simply Scaled-Down Conventional Parts
The manufacturing challenge is determined by proportion, not appearance. A dimensional error that is negligible on a large component may consume most of the tolerance on a miniature feature. The same is true for tool runout, burr height, edge radius, and measurement force.
Every Error Uses a Larger Share of the Feature Size
Influencing factor
Effect on a conventional part
Effect on a small part
Tool runout
May produce minor variation
Can dominate micro-hole or slot size
Cutting-edge radius
Mainly affects transitions
May approach the intended chip thickness
Clamping force
Usually absorbed by part rigidity
Can deform thin walls and small diameters
Chip size
Usually has an open escape path
Can block a narrow hole or groove
Burr height
Often removable by standard methods
May exceed the allowed edge break
Measurement force
Minor dimensional influence
Can deflect the part during inspection
Handling
Usually straightforward
Can cause loss, mixing, or surface damage
The practical question is not whether a component looks small. It is whether the process variables are becoming large relative to its critical features.
Define Manufacturing Risk Before Defining “Small”
No single diameter separates ordinary small parts machining from micro machining. A short 3 mm pin with open tool access may be easier to produce than a 12 mm component containing a deep micro-hole and a fragile internal web.
Classify the part by asking:
Is there enough material for stable workholding?
Is the smallest feature large enough for a robust tool?
Can chips leave the cutting zone?
Can the required edge be deburred and inspected?
Does the measurement method have adequate resolution and repeatability?
Can operators load, unload, clean, and package the component without damage?
Will the process remain stable across an entire material lot?
Separate Small, Miniature, and Micro Features by Process Sensitivity
Product size alone does not determine the manufacturing route. A relatively large body may contain a micro-feature that controls tooling, inspection, cycle time, and rejection risk.
A Small Part Can Still Use Conventional CNC Methods
Conventional turning or milling may remain effective when:
The part is short and rigid.
A stable clamping area is available.
Feature sizes are comfortably larger than the required tools.
Chips have an open evacuation path.
Standard measuring equipment can reach the characteristics.
Production volume is low or the design is still changing.
Secondary positioning does not threaten critical relationships.
This is common in small part cnc machining where the overall component is compact but its features do not require a specialized micro-cutting strategy.
Micro Features Require Different Tooling and Inspection
Feature condition
General machining approach
Micro-feature approach
Hole diameter comfortably exceeds tool runout
Standard drilling strategy
Runout, entry, and tool condition need tighter control
Open external groove
Normal insert selection
Tool width and edge condition become dominant
Rigid wall
Conventional clamping
Clamping force may distort a thin wall
Accessible edge
Standard chamfer or brushing
Magnified or back-side deburring may be needed
Large inspection surface
Contact measurement is practical
Optical or low-force measurement may be preferable
A small component can be correct while clamped and out of tolerance after release. Thin walls, narrow stems, and delicate sealing surfaces are especially sensitive to uneven gripping pressure.
Match the Workholding Method to the Part’s Weakest Section
Workholding method
Suitable use
Main advantage
Principal risk
Collet
Round small-diameter parts
Even contact and repeatability
Excess pressure can deform the part
Swiss guide bushing
Slender bar-fed parts
Supports material close to cutting
Sensitive to bar diameter and straightness
Soft jaw
Short parts and second operations
Can match the component profile
Jaw error or excessive local pressure
Dedicated fixture
Indexed or irregular features
Controls datum and orientation
Added tooling cost and loading variation
Low-force or vacuum fixture
Thin, delicate components
Reduces local contact pressure
Limited resistance to cutting force
The process engineer should identify a noncritical gripping surface whenever possible. A sealing face, precision fit, or cosmetic surface should not become the default clamping location merely because it is easy to access.
Inspect the Component in Its Functional Free State
Inspection instructions should clarify:
Whether the dimension applies while restrained or after release.
How much measurement force is acceptable.
Where the part may be supported.
Whether roundness changes with clamping pressure.
How a thin wall should be oriented during inspection.
Tool Edge Radius and Runout Change the Cutting Mechanism
In precision micro machining, the tool cannot be treated as perfectly sharp. As the intended chip thickness approaches the effective cutting-edge radius, the tool may rub or plough material instead of producing a stable chip.
Extremely Low Feed Is Not Automatically Safer
Reducing feed may appear to lower cutting force, but an excessively low feed can create:
Rubbing rather than shearing.
Heat concentrated at the cutting edge.
Material smearing.
Rapid edge wear.
Built-up material on the tool.
Poor surface finish.
Unstable dimensions.
Larger exit burrs.
Parameters must be validated against tool geometry, workpiece material, spindle condition, rigidity, coolant delivery, and feature depth. Ordinary machining data cannot simply be divided by a scale factor.
Tool Runout Can Overload a Single Cutting Edge
When a small multi-flute tool runs eccentrically, one edge may remove most of the material while the others rub. The result is uneven wear and unpredictable tool life.
Production symptom
Possible cause
Likely result
Verification direction
One cutting edge wears rapidly
Tool or spindle runout
Unstable feature size
Toolholder, collet, spindle
Micro-drill breaks unexpectedly
Unequal loading or chip blockage
Scrap and machine interruption
Runout and evacuation
Surface appears smeared
Feed too low relative to edge
Roughness and dimensional drift
Edge condition and feed
Small hole enters off-center
Tool deflection at entry
Position error
Entry geometry and tool rigidity
Narrow slot becomes wider
Runout or tool wear
Assembly failure
Tool trend and setup
Tool length should be kept as short as access allows. However, shoulders, fixtures, and adjacent features may force extra overhang, making DFM review essential before promising a result.
Chip Evacuation Can Control the Entire Cycle
Small chips are not automatically easy to remove. Relative to a micro-hole or narrow groove, a chip may be large enough to block the cutting path, recut against the finished surface, or overload the tool.
Small Holes and Narrow Grooves Trap Chips Quickly
Common failure modes in machining small parts include:
Chips compacting in a blind hole.
Long aluminum chips wrapping around a small shaft.
Recut chips damaging the wall of a narrow groove.
Cutoff chips entering the collet or guide-bushing area.
Chips remaining inside intersecting passages.
Coolant moving a lightly supported component.
Debris remaining in a thread after cleaning.
Deep drilling strategies should balance penetration, withdrawal, heat, and tool strength. Frequent retraction may improve evacuation but increase cycle time and the risk of re-entry marks.
Coolant Direction Matters More Than Volume Alone
Chip problem
Weak response
Better engineering direction
Micro-hole blockage
Increase spindle speed only
Review feed, peck strategy, geometry, and coolant direction
Chips wrap around the part
Stop repeatedly for manual removal
Establish reliable chip breaking
Narrow groove traps material
Increase depth of cut
Reduce load and preserve an escape path
Cross-passage retains chips
Depend only on final air cleaning
Include process cleaning and verification
Small part moves under coolant
Increase gripping force automatically
Balance pressure, direction, and support
The objective is a self-clearing process that does not depend on frequent operator intervention.
Burr Size May Exceed the Allowed Edge Requirement
Many small machined parts can be cut to size but still fail because of a burr at a cross-hole, thread exit, groove, or cutoff surface. On a miniature feature, an ordinary burr may obstruct assembly, detach in service, or alter flow through a passage.
Internal Intersections Need a Planned Burr Direction
High-risk locations include:
A radial hole entering an axial bore.
A milled slot crossing a turned diameter.
The exit of a micro-drilled hole.
Internal and external thread starts.
Thin-wall edges.
Cutoff surfaces.
Counterbore intersections.
The operation order can sometimes direct the burr toward an accessible surface. If not, the process may need a back-chamfer tool, dedicated brushing, controlled abrasive treatment, or magnified manual work.
Deburring Must Not Destroy the Feature
Deburring method
Suitable direction
Main risk
In-machine chamfer
Accessible hole entrances and edges
Tool clearance
Back-chamfer tool
Rear side of intersecting holes
Tool stiffness and life
Brushing
External edges and open surfaces
Excessive rounding
Abrasive or flow process
Internal passages
Dimensional change and residue
Magnified manual work
Prototype or inaccessible local edge
Repeatability and labor cost
A drawing note saying “deburr all edges” is often insufficient. It should identify protected sharp edges, allowable edge breaks, prohibited loose material, inaccessible intersections, and the inspection method.
Measurement Uncertainty Competes Directly with the Tolerance
The measurement system must be capable enough to separate real process movement from inspection noise. A display with more decimal places does not guarantee a reliable result.
Select the Method by Feature Access and Contact Risk
Feature
Possible measurement approach
Important concern
Small outside diameter
Optical, laser, or low-force contact
Alignment and contact force
Micro-hole
Pin, optical, airflow, or specialized method
Depth, entrance burr, and access
Narrow slot
Vision measurement
Lighting and edge recognition
Coaxial diameters
Rotational method or dedicated fixture
Datum establishment
Miniature thread
Functional gauge and optical review
Usable depth and burrs
Internal intersection
Magnification or borescope
Visibility and residual chips
The chosen method should be agreed before production, especially when different measurement technologies may interpret an edge differently.
Gauge Repeatability Must Be Proven First
Before calculating process capability for precision machining small parts, confirm:
Part orientation is repeatable.
Fixture contact does not distort the component.
Measurement force is controlled.
Optical lighting and focus are standardized.
Temperature is appropriate.
Different inspectors obtain comparable results.
Reference standards and calibration are current.
The measurement uncertainty is acceptable relative to the tolerance.
Otherwise, a stable machining process may appear unstable—or actual drift may be hidden by measurement variation.
Choose Swiss, Conventional Turning, or Micro Machining by Geometry
Process selection should follow the smallest critical feature, workpiece rigidity, production volume, and complete operation route.
Swiss-Type Production Favors Slender Bar-Fed Components
Micro swiss machining deserves evaluation when the component has:
A high length-to-diameter relationship.
Several coaxial diameters.
Axial and radial holes.
Front and rear features.
Grooves, flats, or threads.
Medium or high recurring demand.
Consistent bar stock.
A need to reduce manual reorientation.
Guide-bushing support can reduce the effective unsupported length, while live tooling and a sub-spindle may consolidate several operations. These advantages still depend on actual machine configuration, bar quality, tooling access, and inspection capability.
Conventional Turning Favors Short and Rigid Parts
Conventional turning may be more efficient when:
The part has a low length-to-diameter ratio.
A stable chucking or collet surface exists.
Diameter exceeds the appropriate Swiss machine range.
The starting form is a cut blank, forging, or casting.
A component does not need to be microscopic to require miniature machining services. A larger part may contain one micro-hole, narrow groove, thin web, or miniature thread that determines the manufacturing strategy.
Conversely, a visibly small component may use standard methods if its geometry is rigid and accessible. Suppliers should describe the tooling, workholding, inspection, and burr strategy rather than relying on an undefined “micro” label.
Material Behavior Becomes More Visible as Features Shrink
Material properties remain the same, but their manufacturing consequences become more severe when tools, walls, threads, and passages are small.
Aluminum Requires Chip and Built-Up-Edge Control
Aluminum may support lightweight small parts manufacturing, but the process must address:
Long or adhesive chips.
Built-up material on small cutting edges.
Surface smearing.
Thin-wall deformation.
Alloy and temper differences.
Dimensional effects of anodizing.
Cosmetic handling requirements.
A sharp tool and effective chip path may be more valuable than simply increasing spindle speed. Critical fits should also account for whether dimensions apply before or after surface treatment.
Stainless Steel and Brass Create Different Risks
Stainless steel may introduce concentrated heat, work hardening, increased cutting force, and rapid wear of micro-tools. Brass may machine efficiently but still require attention to burrs, edge quality, material grade, and application compliance.
Material selection must follow the customer drawing and confirmed production capability. It should not be generalized from one alloy or one successful sample.
Detect Production Drift Before Parts Fail Inspection
A correct first article does not prove that the process will remain stable after several bars, tool changes, thermal cycles, or material lots.
Monitor Trends Instead of Waiting for Rejection
Production symptom
Possible cause
Control response
Small outside diameter increases gradually
Tool wear
Trend measurement and controlled offset
Micro-hole changes suddenly
Drill damage or breakage
Immediate tool and hole verification
Burr height increases
Edge wear
Predetermined inspection and tool-change point
Slot width varies periodically
Runout or trapped chips
Inspect toolholding and evacuation
Batch begins at a shifted size
Setup, material, or temperature change
First-article and lot comparison
Surface finish deteriorates
Built-up edge or vibration
Inspect cutting edge and support
Offset changes should follow diagnosis. Compensating for random variation can move the process farther from its target.
First Article and Pilot Production Serve Different Purposes
In small component manufacturing, the pilot batch is particularly useful because handling and inspection problems may not appear on a single sample.
Application Requirements Change the Control Plan
The same geometry may need different controls depending on how the part is assembled, cleaned, documented, and used.
Automotive Small Parts Need Repeatability and Traceability
Automotive applications may include sensor pins, connector elements, alignment features, threaded inserts, adjustment shafts, and small control components. Their requirements may include:
Medical Equipment Parts Need Burr and Cleanliness Control
Small fittings, pins, instrument parts, and connector structures may require controlled passages, threads, edges, material records, cleaning, and change management.
The article should not be interpreted as claiming FDA registration, ISO 13485 certification, implant approval, or another regulated status unless that status has been separately verified for the quoted scope.
Electronics and Semiconductor Parts Require Careful Handling
These applications may prioritize:
Clean holes and passages.
Low-burr intersections.
Cosmetic surfaces.
Precise positioning features.
Electrical or thermal behavior.
Lot separation.
Protection against part-to-part contact.
Accurate counting of very small components.
Packaging should be treated as part of the manufacturing route, not an afterthought.
What Engineers Should Include in a Small-Part RFQ
A complete RFQ allows the manufacturer to evaluate whether the smallest critical feature is compatible with the proposed workholding, tooling, inspection, and batch plan.
H3: Minimum Technical Information
Include:
Controlled 2D drawing and 3D model.
Material grade and condition.
Functional datums.
Critical dimensions and geometric tolerances.
Micro-hole, narrow-slot, thin-wall, and thread requirements.
Burr and edge definitions.
Surface roughness.
Heat treatment or surface finish.
Prototype quantity.
Production batch and annual volume.
Inspection-document requirements.
Cleaning and packaging instructions.
Questions That Reveal Real Small-Part Capability
Ask the supplier:
How will the part be held without deformation?
What controls tool and spindle runout?
Which features require micro-tools?
How will chips leave small holes and narrow grooves?
How will internal burrs be removed and inspected?
Which dimensions need optical or low-force measurement?
How is tool life established?
Will prototypes and production use the same route?
How will tiny parts be counted and protected?
Which requirements are driving cost, risk, or lead time?
Clear answers are more valuable than an unsupported claim that every feature can be held to the same minimum tolerance.
Google People Also Ask About Small Precision Parts
The following questions appeared in Google’s English People Also Ask results for “small precision parts.” An unrelated question about the seven major parts of a milling machine was excluded.
What Are Some Examples of Precision Components?
Examples include small shafts, pins, bushings, sleeves, threaded inserts, connector bodies, fittings, valve stems, adjustment elements, and miniature transmission parts. Their precision comes from controlled function rather than size alone. A component may need reliable diameter, runout, position, thread, surface, edge, material, and cleanliness requirements. The correct production route depends on geometry, feature accessibility, batch demand, and how the part will be measured and assembled.
What Are Precision Parts?
Precision parts are drawing-controlled components manufactured so defined dimensions, geometric relationships, materials, surfaces, edges, and functional features meet an agreed requirement. They may be turned, milled, drilled, threaded, deburred, finished, and inspected. A small standard fastener is not automatically a precision part, while a larger component with a critical micro-hole may require precision methods. Acceptance should be tied to the drawing and verified measurement process.
What Is Micromachining?
Micromachining is the manufacture of very small parts or features where tool size, cutting-edge radius, runout, chip formation, burrs, handling, and measurement significantly influence the result. The whole part does not need to be microscopic; one micro-hole, thin wall, narrow groove, or miniature thread can determine the process. Because manufacturing behavior changes with feature scale, micromachining requires suitable tooling, stable workholding, controlled parameters, effective chip evacuation, and appropriate inspection.
Build a Stable Process Around the Smallest Critical Feature
Successful production of small precision parts begins by identifying the feature most sensitive to clamping, runout, chip blockage, burrs, or measurement uncertainty. The manufacturing route should then protect that feature through suitable workholding, short and stable tooling, validated cutting parameters, planned chip evacuation, controlled deburring, and a capable inspection method. A first article confirms the setup, while a pilot batch reveals tool-life, handling, and repeatability risks before full production. Send Yueyi Precision the drawing, material, smallest features, functional datums, prototype quantity, annual demand, inspection needs, and packaging requirements for a route-specific DFM review.
Ready to start
Your next project?
Contact our technical experts today for a customized solution and a tailored quotation.
Our expert team will contact you within 24 hours
to provide a free technical evaluation and solution design, helping you upgrade your production process.
ADDRESS
NO.22,You Yi Road ,Wulian Community, LongCheng Street ,Long gang District ,Shen Zhen