How Custom CNC Aluminum Enclosures Are Machined to Hold Critical Dimensions
An enclosure may look like a simple box, but its function depends on a small group of dimensions. Its profile controls installation; its pocket provides assembly clearance; bosses locate components; and openings align with connectors. The cover must sit without rocking, interference, or an uneven gap.
The machining supplier does not need to redesign the customer’s electronics. Its task is to convert an approved model and drawing into repeatable custom CNC aluminum enclosures while protecting fit and assembly dimensions. This requires suitable workholding, datums, material-removal sequence, and finishing operations.
This guide explains how enclosure geometry affects milling, which dimensions need explicit control, how distortion is managed, and what information supports quotation and inspection.
What Makes Custom CNC Aluminum Enclosures a Demanding Machining Job?
Most enclosure bodies combine a large internal cavity with relatively thin surrounding walls. That combination removes much of the stiffness of the starting block. Features located on different faces may also require several setups, while visible surfaces must remain free from clamp marks and handling damage. The difficulty is therefore not the box shape itself; it is preserving the relationships among the remaining surfaces after substantial material removal.
A Simple Shape Can Contain Several Critical Relationships
The length, width, and height shown on a drawing are rarely the only dimensions that determine whether the enclosure works. A board may locate from three bosses inside the cavity, while its connector must pass through an opening on a side wall. A lid may locate on a machined recess, yet its screw holes are patterned from the enclosure centerline. Each feature can pass inspection independently, and the assembly can still fail if their datum relationships are not controlled.
Before programming begins, the machinist should identify the functional chain. Typical chains include the internal mounting face to the connector centerline, the cover seat to the enclosure height, and the external mounting face to the internal component position. These relationships guide setup selection and inspection more effectively than treating every dimension as equally important.
Deep Cavities Change Tool Access and Part Stiffness
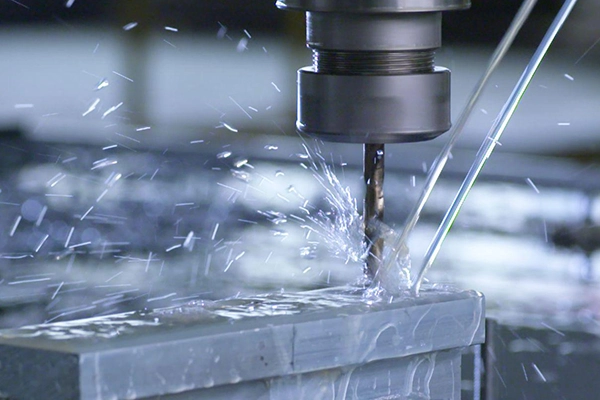
A CNC milled aluminum enclosure often starts as plate or rectangular stock. Roughing the cavity may remove most of its original mass. As the pocket becomes deeper, tool reach increases and wall support decreases. A long cutter is less rigid than a short one, so it is more sensitive to chatter, deflection, and corner loading. The same nominal tolerance can consequently require very different machining effort in a shallow tray and a tall enclosure.
Internal corner radii should be large enough for a practical end mill wherever the assembly permits. A tiny radius at the bottom of a deep pocket may force the use of a small, long-reach tool across the entire corner. That increases cycle time without improving the enclosure’s function. Relief near a boss or local component can often provide the required clearance more economically than reducing every internal radius.
Selecting Stock and a Machining Route for CNC Machined Aluminum Enclosures
The manufacturing route should follow geometry and quantity. A billet aluminum enclosure offers freedom to create variable pockets, bosses, ports, and mounting details in one piece. An extruded blank can reduce material removal when the section remains constant. The best route provides the required geometry without paying for unused process flexibility.
Comparing Practical Enclosure Routes
Manufacturing route
Suitable geometry
Main machining concern
Typical reason to choose it
Solid-stock CNC body
Variable pockets, integral bosses, local wall changes
High material removal and changing stiffness
Maximum geometry freedom
Extruded blank plus CNC
Constant body section with machined ends and openings
Raw profile variation and datum selection
Repeated lengths or higher quantities
Machined body and separate lid
Open cavity with accessible internal features
Lid alignment and assembly gap
Easier machining and service access
Multiple machined panels
Large enclosure with mostly flat surfaces
Tolerance stack across joints
Reduced deep-pocket machining
Solid stock is generally appropriate when internal geometry changes along the body or several faces need accurately related features. Extrusion is more efficient for a repeated constant section, but raw extruded faces are not automatically precision datums. A machined pad may be required before producing tightly located holes.
Establishing Datums for Aluminum Enclosure CNC Machining
A clear datum scheme tells manufacturing and inspection which surfaces establish the part’s position. Without it, the programmer may choose convenient setup references that do not match the way the enclosure functions. The inspector may then measure the same features from different origins, producing results that are individually correct but not useful for assembly.
Start with the Surfaces That Locate the Finished Product
The primary datum should normally be a stable functional surface, such as the enclosure base, a mounting flange, or a cover seating plane. A secondary datum can orient the long direction, while a tertiary feature fixes the remaining degree of freedom. Small cosmetic edges, thin free walls, and unfinished stock surfaces are poor choices for tightly controlled coordinate systems.
For aluminum enclosure CNC machining, it is useful to separate functional datums from temporary manufacturing datums. A sacrificial clamping surface may be used early in production, but final critical features should ultimately be related to the drawing datums. When the functional face cannot be contacted during a later setup, qualified soft jaws, locating pins, or a dedicated fixture can transfer that relationship.
Avoid Long Chains of Coordinate Dimensions
Suppose a PCB mounts on internal bosses and carries a connector that passes through a side opening. If the boss pattern is dimensioned from the left external wall and the opening is dimensioned from the right wall, variation in overall width enters the assembly stack. Relating both features to a shared center plane or functional datum produces more direct control.
The drawing should identify true critical relationships rather than applying tight tolerances to every size. Over-tolerancing nonfunctional dimensions increases programming, finishing, and inspection effort. Under-defining a connector or cover relationship transfers the decision to the supplier. A compact critical-dimension table is often more useful than a crowded drawing full of identical general tolerances.
Controlling Deep Pockets and Thin-Wall Aluminum Enclosure Machining
Thin walls do not have a universal safe thickness. Their behavior depends on height, length, unsupported area, material condition, cutter engagement, and the way the part is restrained. A short local wall may machine reliably at a thickness that would be unstable across a large enclosure side. The drawing and model therefore need to be reviewed as a complete geometry.
Leave Support in Place During Rough Machining
Removing the cavity directly to final size can leave the walls flexible before finishing begins. A more stable strategy is to rough the pocket while retaining uniform stock on the walls and floor. Material can be removed in balanced passes, and critical surfaces can be finished after the major internal stress changes have occurred.
Where geometry permits, the toolpath should avoid concentrating heat or cutting pressure on one long wall for an extended period. Finishing opposite walls in a controlled sequence can reduce asymmetric movement. Tall walls may require lighter radial engagement, sharper tools, and more than one finishing pass. These measures increase cycle time, so an unnecessarily thin wall has a direct cost effect even when it is technically machinable.
Clamp the Part Without Reproducing Clamp Force in the Finished Shape
Strong clamping does not always create a more accurate enclosure. If a thin body is forced flat in the fixture, its dimensions may appear correct while restrained and change after release. Soft jaws should support stable regions and distribute force without marking cosmetic faces. Dedicated internal supports or staged fixtures may be justified for repeat production.
Inspection conditions also matter. A free-state flatness requirement should be measured without distorting the part on the inspection surface. If the enclosure is intended to assume its final geometry only after being bolted to a rigid assembly, that condition should be stated explicitly rather than assumed by the supplier.
Review Wall Height, Corner Radius, and Floor Thickness Together
Wall thickness cannot be assessed separately from pocket depth. Deep cavities require longer tools, while small bottom radii require smaller cutters. A thin floor may also move as material is removed from the opposite side. The combination can make an apparently ordinary thin wall aluminum enclosure machining project much more sensitive than a simple wall-thickness value suggests.
A useful DFM review should therefore identify high aspect-ratio walls, deep narrow channels, abrupt thickness transitions, inaccessible corners, and large flat floors. The response may be a larger radius, a thicker local region, a removable cover, a different setup, or simply a realistic tolerance on a noncritical surface.
Machining Holes, Cutouts, Bosses, and Threads in Custom CNC Aluminum Enclosures
External openings and internal mounting features are usually the most assembly-sensitive areas of an enclosure. Their nominal shapes are easy to model, but tool access, edge distance, burr direction, thread depth, and datum relationships determine whether the finished components install correctly.
Connector Openings and Side-Wall Cutouts
Rectangular ports contain internal corner radii because they are milled with rotating tools. If a connector flange covers the opening, these radii may have no functional effect. If a square component must pass through the cutout, corner relief or a revised opening may be necessary. The required solution should appear in the model rather than being improvised during machining.
Openings close to the top edge or an internal boss also deserve attention. The cutter must enter and exit without leaving an unacceptable burr on an inaccessible face. Side features may require an additional setup or multi-axis positioning. Grouping related openings on accessible faces and providing realistic corner radii can reduce both setup count and hand deburring.
Internal Bosses and Component Mounting Patterns
Integral bosses save separate hardware but require surrounding cutter clearance. Their diameter should support the specified thread and edge distance while allowing an end mill to clean the surrounding floor. Very narrow gaps between a boss and wall can create deep slots that are slow to machine and difficult to deburr.
Boss height is often more important than the outside enclosure height because it controls the mounted component position. If several bosses support one board, their top faces may need a common-plane requirement. Hole position should be related to the same datums used for associated connector openings. For CNC aluminum electronics enclosures, these few dimensions often matter more than broad tight tolerances on the entire cavity.
Direct Threads, Inserts, and Usable Thread Depth
Direct tapped holes are efficient when the enclosure has enough material and the product will not be disassembled repeatedly. Threaded inserts may be preferred when service cycles, clamp load, or repairability justify the additional operation. The customer should specify the insert standard and installation requirement rather than only showing a generic threaded symbol.
Blind holes need room for drill-point depth, tap lead, and chip clearance beyond the required full thread. A drawing that equates hole depth with usable thread length can produce bottoming screws or incomplete engagement. Threads near an external wall also need sufficient remaining material. When anodizing is specified, masking, dimensional allowance, or post-finish thread treatment should be agreed before production.
Holding Cover Fits and Other Critical Dimensions on a CNC Aluminum Enclosure
In custom CNC aluminum enclosures, the body and cover should be treated as a mating set even when they appear on separate drawings. The cover seat, locating step, screw pattern, and visible perimeter gap interact. Tightening screws can pull parts together, but it cannot reliably correct a misplaced locating feature or an uneven seating plane.
Use Locating Features for Position and Screws for Clamping
Clearance holes allow screws to enter, but that same clearance permits lateral movement. When cover position affects appearance or an internal interface, a machined shoulder, shallow recess, pilot diameter, or locating pins can establish repeatable alignment. The selected feature must still include practical assembly clearance after finishing.
The cover should contact the intended seating surface rather than a boss, insert, or trapped component. If a gasket is customer-specified, the drawing must define the groove and finished interface requirements. The machine shop can manufacture and inspect those features, but product-level sealing performance remains dependent on the complete design and validation of the assembled product.
Identify Dimensions That Remain Critical After Finishing
An anodized CNC aluminum enclosure can have different fit behavior from the unfinished machined part. Coating growth may affect close-fitting steps, small holes, threads, and contact regions. Cosmetic blasting can also soften sharp visual transitions without correcting machining marks or surface waviness.
The drawing should state whether dimensions apply before or after finishing and identify masked areas where necessary. Mating parts should be evaluated in their finished condition. It is especially risky to approve a raw prototype with almost zero clearance and assume that the same fit will remain after surface treatment.
H3 Build a Short List of Key Enclosure Dimensions
Instead of demanding the tightest possible tolerance everywhere, classify dimensions by function:
Assembly-critical dimensions: boss height, hole position, connector alignment, cover location, and mating fits.
Machining-control dimensions: wall thickness, floor thickness, deep-pocket depth, and remaining material around threads.
Installation dimensions: external mounting pattern, flange position, and overall envelope where space is limited.
Cosmetic dimensions: visible gap, edge consistency, and alignment between the body and cover.
Reference dimensions: non-controlling information included to help interpretation.
This hierarchy helps the supplier allocate stable setups, inspection time, and process controls to the features that can actually stop assembly.
Inspecting CNC Machined Aluminum Enclosures Before Assembly
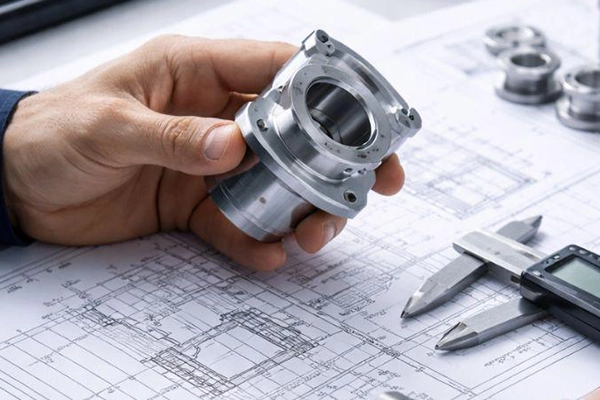
Inspection of custom CNC aluminum enclosures should follow the functional datum structure established on the drawing. Measuring every accessible dimension is not automatically better than verifying the features that govern assembly. A focused plan combines dimensional measurement, gauges, visual checks, and a representative fit test where appropriate.
Match the Inspection Method to the Feature
Critical feature
Suitable verification approach
Assembly risk controlled
External mounting pattern
CMM or dedicated gauge
Enclosure will not install
Internal boss pattern
CMM or functional board fixture
PCB holes misalign or board is stressed
Boss top height
Height or CMM measurement
Component sits tilted
Connector cutout position
CMM, optical measurement, or functional gauge
Connector fouls the wall
Cover seat and step
Depth, profile, and fit check
Cover rocks or gap becomes uneven
Threaded holes
Thread gauge and sample fastener
Screw binds or lacks engagement
Thin free walls
Free-state dimensional check
Part changes shape after release
Cosmetic surfaces
Agreed visual inspection
Batch appearance is inconsistent
Inspection reports should identify the drawing revision and finishing condition. If the body and cover are made as matched assemblies, sample assembly can reveal problems that separate measurements miss. Representative hardware is particularly useful where several tolerances combine at one interface.
Preparing an RFQ for Custom CNC Aluminum Enclosure Manufacturing
An RFQ for custom CNC aluminum enclosures should let the supplier plan setups and protect critical dimensions before pricing. A 3D model defines geometry, but it does not replace a controlled drawing. Quantities, finish, inspection, and assembly requirements also affect the manufacturing route.
Files and Requirements the Machine Shop Needs
Include the following information whenever it applies:
A STEP or other agreed 3D model for the enclosure body and cover.
A revision-controlled 2D drawing with datums, tolerances, threads, and finish notes.
Aluminum alloy and temper, plus whether material alternatives may be reviewed.
Prototype quantity, expected production quantity, and batch size.
Identification of assembly-critical, installation-critical, and cosmetic features.
The condition in which dimensions apply: machined, finished, free state, or assembled.
Thread insert specifications and any customer-supplied hardware.
Cosmetic zones, color requirement, texture, marking, and packaging expectations.
Inspection report, material documentation, or sample assembly requirements.
Mating-part information when the cover, connector, board, or mounting interface controls fit.
For a meaningful quotation, the supplier should be able to distinguish required features from preferences. A tight tolerance that has no functional reason may add extra setups and inspection. Conversely, a critical relationship left under a general tolerance can cause assembly failure. Highlighting the small number of dimensions that truly matter is one of the most effective ways to improve both cost and manufacturing reliability.
People Also Ask About Custom CNC Aluminum Enclosures
These questions reflect the practical concerns engineers commonly raise before sending an enclosure drawing for quotation. The answers remain project-dependent because size, geometry, finish, and mating parts change the machining conditions.
Can an Aluminum Enclosure Be CNC Machined from a Solid Block?
Yes. Solid stock allows integral bosses, variable-depth pockets, connector openings, and related mounting features. It suits prototypes and geometry that a constant extrusion section cannot create. Because it removes more material, extrusion or multi-part construction may be preferable when geometry and quantity support them.
What Aluminum Alloy Is Commonly Used for CNC Machined Enclosures?
6061-T6 is common because it machines well and supports many enclosure finishes. Selection must still follow the drawing and the product’s strength, corrosion, appearance, and operating requirements. The supplier should confirm availability and finishing compatibility rather than substitute material without approval.
How Thin Can the Walls of a CNC Aluminum Enclosure Be?
No single minimum applies to every enclosure. Wall height, length, unsupported area, ribs, pocket depth, tolerance, and clamping all affect behavior. Identify functionally constrained walls and let the supplier review the complete model so noncritical surfaces receive realistic tolerances.
Which Dimensions Are Most Important on a Custom Aluminum Enclosure?
Key dimensions control assembly and installation: boss height and position, connector openings, cover seats, mounting patterns, fits, threads, and remaining wall or floor thickness. Their datum relationships should be explicit. Overall size may also be critical when installation space is restricted.
Should Enclosure Dimensions Be Inspected Before or After Anodizing?
It depends on the drawing and finished interfaces. Close fits, small bores, threads, cover steps, and masked areas may need final-condition verification because anodizing can affect them. The drawing should state the required condition so allowances, masking, and inspection are planned in advance.
Ready to start
Your next project?
Contact our technical experts today for a customized solution and a tailored quotation.
Our expert team will contact you within 24 hours
to provide a free technical evaluation and solution design, helping you upgrade your production process.
ADDRESS
NO.22,You Yi Road ,Wulian Community, LongCheng Street ,Long gang District ,Shen Zhen